Thursday, January 21, 2016

floral dreams in a monochrome season

Today, I went to the painting class at Stella Niagara, in Lewiston, New York. The theme of the class was posies. That immediately makes me remember my kindergarten days, when we played "ring around the rosie, a pocket full of posies..." and then fell down in a heap of giggling children.

That was a long time ago.

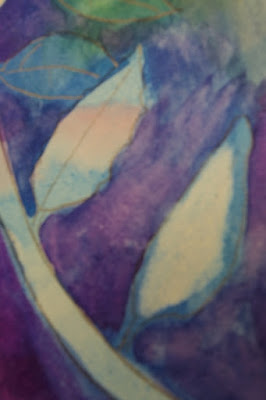
Today, we painted posies. They are small flowers that grow in groups and are surrounded by very large leaves that curl. Above, you can see the drawing that I did on the watercolor paper. I tried to fill the page so I made the plants larger than life size. One of my most favorite artists in Georgia O'Keeffe, who painted extremely large flowers.

Posies come in a variety of colors, including red, pink, orange, and blue. I chose to paint blue posies.

To add interest, as well as depth, to blue petals, I used three different shades of blue. 

After I was finished with the petals, I began painting the leaves, using several colors.

The center of the flowers is yellow and it has a star shape. Also, I added detail to the leaves, including the pattern of veins.

This is the completed painting. I chose yellow and purple for the background. Yellow and purple are complementary colors (opposites on the color wheel). Also, there is a great deal of yellow in the painting so the background colors bring out the flower. The last thing that I did was to sharpen the edges.

So here you go. Flowers for a winter's day.


Wednesday, January 20, 2016

morning painting session

It's another cold, wintry day, a good day to stay inside and paint. I chose one of my photographs to use as a basis of a painting. I had taken that photograph in August of 2014, when I went to a ceremony to remember the victims of the atomic bombings of Hiroshima and Nagasaki. I took the photograph at the Japanese gardens in Delaware Park in Buffalo, New York. The garden design is based on a garden design in Kanazawa, Japan, Buffalo's sister city.

First, I started with a sketch (see above).

My next step was to do the underpainting. It is tempting to paint all of the background trees one shade of green but, in real life, trees are not that uniform. So I varied the colors of the trees, mixing together a very dark yellow (almost brown), yellow, red, and a few shades of green. 

After letting the painting dry, I continue to add color.

This is the finished version of the bears at the Japanese garden. It was fun for me to imagine a world full of color on a cold winter day.


This is the photograph, which was taken in the summer.

Question for discussion: What do you like to do to add color to your world during the winter?

Friday, January 15, 2016

when the bears hibernate...

... The snow humans play...

Snow humans at night
dancing while heavy snow flies
under a tall tree.

Snow glittering bright
beneath a silvery moon
magical winter.

snow sits on rivers,
on creeks and on giant hills,
fluffily bright white.

Hidden underground
sleeping plants await their time
vivid hopes of spring.

Friday, January 8, 2016

A step by step guide to painting negative space

Yesterday, I went to Stella Niagara Educational Park for a painting class. This time, the instructor, Virginia Kelley, offered a lesson on negative painting. This is an exciting technique for watercolor painting that adds a great deal of depth to the painting. Instead of painting the objects, you are painting the space around the objects. Virginia suggested that we make our paintings somewhat smaller than usual, so we each used a half-sheet of watercolor paper.

Virginia took us through the process, step by step, which I really appreciated because I have difficulty remembering multi-step directions.

The first thing that she had us do was to draw a picture of one daisy. Also, we needed to draw the stem. The stem comes from the center of the daisy, so if the daisy is off center, which is what Virginia suggested, the location of the daisy should indicate that. Having an off-center daisy is visually more appealing because it suggests movement. There is my daisy, above.

The next step is to make a blue wash. For this, you will put blue watercolor paint on whatever item you are using to mix paint. Add lots and lots of water to your paint because this wash should be light. Cover everything except the flower with the blue wash. You can cover the stem, too. After that, add some spots of color. 

Before you go on to the next step, your painting must be completely dry. One way to dry it is to use a blow dryer. After drying the painting, darken the lines that indicate a stem and extend the lines off the paper.

You will now draw in two more flowers and a few leaves.

Mix a darker shade of blue and paint around the outlines of the flowers and the stems and the leaves. You have added your second wash. Once again, thoroughly dry the painting. Once the painting is dry, you could add a few more things: some flowers that have not opened yet and a butterfly or a bee.


At this point, you could use a darker blue or a different color for a third wash. I chose purple.

At this point, you may want to lighten some of the leaves. A magic eraser sponge does a great job in getting rid of excessive pigment on your painting.

Now you're at the cleaning up stage. Paint around the edges of all of your objects: flowers leaves, stems, butterfly, etc., so that you can have crisp lines. Add the veins to the leaves.


To give more depth to the leaves, add some color, but not too much. Make sure to be gentle about adding color at this point. Also add some detail to the butterfly.

One of the challenges of painting is knowing when to stop painting to prevent your creation from being overworked. This is a good place to stop. The only thing left to do is to sign your painting. You can photograph it and share the pictures with all of your friends.

After a week or so, the painting will be thoroughly dry and the colors will shine even more than they do after your painting is just finished.

Tuesday, January 5, 2016

The Bears Celebrate

Synopsis of Previous Bear stories: Bearnacle Bear took his ship to sea and was the unfortunate victim of a terrible storm. He was taken prisoner by the humans. Eventually, he escaped and was able to retrieve his ship and crew and return home. He had been away for so long that the crew, which found shelter on an island, had a whole collection of bear cubs. One of the bear cubs was Sweet Suzie Bear. Bearnacle Bear and his crew had been rescued by the Sea Monster and the Mermaid, who are usually quite elusive.
The bears and the humans later became friends. Sweet Suzie Bear grew up and went to art school in the Land of the Humans and later became curator of the Bears Art Gallery. Her most recent exhibit was titled "Modern Art Bear." It received positive reviews in the publications of bears, humans, and giants alike.
Later, Bearnacle Bear took a group, including Beartrand, the radio station bear, and Sweet Suzie Bear, to visit the Land of the Giants. Sweet Suzie Bear kept detailed journals and had a great time. Unfortunately, Beartrand Bear suffered from seasickness . I'm going to be a sailor, he wrote.  Let's not and say we did, he added later. 

The bears are back at home and are ready to celebrate their trip to visit the Land of the Giants before hibernation.
The bears are ready to celebrate their trip with wine that they brought back from the Land of the Giants. There is also sparkling grape juice and hot chocolate. The wine was given to the bears by the giants and are in bottles that are giant-sized.

Everyone laughs and sings and tells stories about the adventures of the bears in the Land of the Giants. They talk about making music by dancing on the giant pianos and about cookies that were the size of dinner plates. They talk about snowflakes that were as big as snowballs. As they talk and drink their beverages, they grow more and more sleepy, and they know that it is time to...

hibernate....

next bear story: Bearnacle Bear, Sweet Suzie Bear, and friends visit Mouse City.

Sunday, January 3, 2016

Draw a snow human: beginner art lesson

Note: This is the first in an irregular series of guides to drawing for beginners. It is a step by step demonstration of how to draw an object. Feel free to print this out. This is something that you can do with kids. It is all about fun so relax and have a good time.

One of the biggest mistakes that beginning artists make is to try to draw too much detail when they first start drawing. I know about that because I was that type of beginner. After struggling with massive amounts of detail and erasing furiously, some of the pictures simply found their way to the trash receptacle, where they met a sad fate. These days, fewer of my pictures are ending up in the recycle bin.

The reason for the saving of the pictures?

Start with a minimum of detail and add the details later.

When you look at an object that you want to draw, look for the shapes and draw a series of shapes. This wooden snow human has just a few main shapes: cylinders and a circle and a very compact roundish oval shape (technical term, lol).

Above, I have drawn shapes, one on top of the other. At this point, the only drawing utensil that I need is a number 2 pencil.

You can now start embellishing on each shape. Here, I have added some details to the hat. 

I start making a few corrections. The top of the head needs to be a little wider so that the hat fits more snugly.

Even if the face is non realistic, you will still want the proportions to be relatively accurate. In a head, the eyes are right at the middle. Draw your first construction line at the halfway point. Add your eyes. Then draw the next construction line halfway between the eyes and the bottom of the face. That is where you will add the nose. The mouth will go directly beneath that.

In a later beginner art lesson, I will demonstrate a more realistic looking face.

Here is the entire snow human with the details added. Add a few lines next to and beneath the snow human so that it looks as if it is on the ground. Without those lines, the snow human will appear to be floating somewhere in space.


Outline the snow human with a black pen. Not a ball point pen... more like a Sharpie.


Here, you can start adding a background color.

When you color in the top hat, remember that it is shiny. You'll want to leave some white in it. That shows that it is reflecting the light of the sun.

Beneath the snow human, add a dark shadow. This small shadow is called the "cast shadow." That is the shadow cast by the object. This shadow will further made the object appear as if it is sitting on the ground.

Which brings me up to one more point. Art is about making things appear as you want them to appear. It is illusion... unless you're doing sculpture or some other three-dimensional art form, you are giving the illusion of a three-dimensional object on a two-dimensional piece of paper.

Your drawing doesn't have to be an exact replica of the original object.

Have fun and enjoy drawing.